My house smells of delicious-ness!

Sunday. A family day. A worship day. A relaxing day. And of course a slow cooker day!

On the weekends I try to cook a few larger meals so that there are leftovers for Monday lunch at work, and possibly Monday evening if I am running late. While getting a few necessities today (and several other non-essentials as it always seems), I wandered the aisles of Costco to plan my supper meal. The boys were with me and joyfully tried many free samples to their hearts content. Why is it that they are so keen to try new things at Costco? Is it the atmosphere? Or the unintentional peer pressure as we quickly move table to table, with eyes all around?

Fish tacos? “No mom, I don’t like that”. Lamb roast? Too expensive today. Pork roast? On sale?! Done.

Now how to prepare it…thinking…thinking…why don’t I dust off a cookbook? That is why I buy them right? It seems I review them less and less now with the internet having such an array of websites that are easier to search based on the ingredients I may have when I don’t plan ahead. Sound familiar? I am a huge fan of the scrumptious recipes in “Cook!” by Dietitians of Canada, a compilation from Dietitians, Chefs, and Nutritionists. Since I never seem to have exactly the right ingredients for most recipes, I often adapt what I can to fit my household pantry and budget. Tonight I adapted the “Pork tenderloin with rhubarb chutney” recipe and subbed a pork roast in my slow cooker for convenience.

Pork Roast for 6-8 servings

  •  One 2 – 3 lbs pork roast ( I bought the large package which was 2 large and divided it into 4 smaller roast meals so there was less leftovers)
  • 1 tbsp garlic powder
  • 1 tbsp cumin
  • a few turns of my salt and pepper mills
  • 1 cup organic chicken broth (is very low sodium)
  • Throw your ingredients in the slow cooker. Give the roast a turn in the spice mixture. Cook on high for 3 – 4 hours. Walk away and do other things as part of Sunday family time! When ready, let sit for 5 minutes before carving.

1 hour before you want to eat: Prepare side dishes. This may require the full hour depending on how much attention your children are needing! 😉

#1: Salad. Be as creative as you want!

#2: Roast potatoes and yams, my own concoction
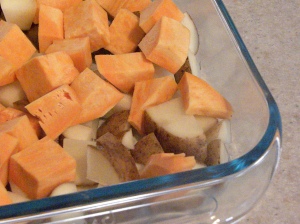
Roast potatoes and yams
  • Cube 1 medium yam, peeled
  • Cube 5 small Russet potatoes, not peeled
  • Toss lightly in olive oil
  • Sprinkle & toss again with 1/2 tbsp smoked paprika, 1/2 tbsp garlic powder, 1/2 tbsp onion powder, a pinch of pepper, and 1 tbsp of parmesan cheese.
  • Roast in the oven at 450F for 25 minutes.

#3: Rhubarb chutney
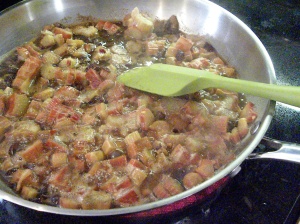
DSCN8742
Rhubarb chutney
  • 3/4 cup granulated sugar
  • 2 tbsp ginger powder*
  • 2 tbsp garlic powder*
  • 1 tbsp onion powder*
  • 2 tsp cumin powder
  • 1 tsp cinnamon
  • 1 tsp cloves
  • 1/2 tsp hot pepper flakes
  • 30ml balsamic vinegar
  • 30 ml white vinegar
  • 15 ml red wine vinegar
  • 4 cups frozen rhubarb (mine was partially thawed)
  • 1/3 cup Craisins
  • In a large saucepan, combine the sugar, ginger, onion powder, garlic, cumin, cinnamon, cloves, hot pepper flakes and vinegars. Bring to a simmer over medium heat until the sugar dissolves. Stir in the rhubarb and Craisins while bringing to a boil. Reduce heat and simmer for about 20 minutes until mixture is thick and syrupy.

Put it all together, and Voila!
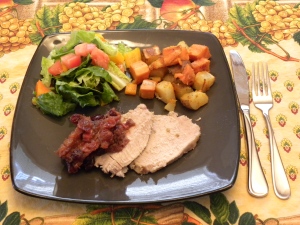
The full meal deal!
The full meal deal!


Hope this inspires you for next Sunday supper. ~ Melissa

Pulled pork-a-licious for your next family meal

Time. We never seem to have enough of it right? I feel that way sometimes. That life is moving faster than I can handle it, that the kids are growing up too fast, and I feel rushed to do this or that most of the time. Time. It is something I could use more of, but i also could spend more of it focused on what really matters: My Family.  I counsel parents and their kids for a variety of reasons. Whether it be for poor growth, obesity, or picky eating, there is one question I ask of all my parents: Do you eat meals as a family? Some say yes, some say no, but most say that they are lucky if they all sit down for one meal a day as a family. Most do not realize how important a family meal truly is to their family’s health.

eatright ontario sums it up best: “families that eat together eat better!…Children who eat with their families also consume more fibre, calcium, folate, iron, and vitamins B6, B12, C and E,and less saturated fat and trans fat.” A family meal is crucial to the development of healthy eating habits and implementation of any nutrition-related plan. a family meal is also an opportunity for learning about food and how to prepare it. It is a safe place to share about our day and explore family traditions – especially when it comes to holidays! There is no time like the present to start making time for family meals! Here is a recipe for your next family meal:

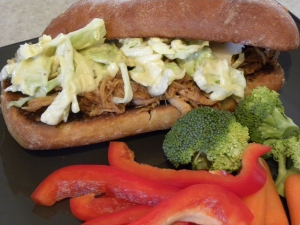
Pulled Pork-a-licious!

Ingredients:

  • 1 teaspoon vegetable oil
  • 1.5 kg pork roast
  • 1/2 cup ketchup
  • 1/2 cup apple cider vinegar
  • 1/2 cup chicken broth
  • 1/4 cup light brown sugar
  • 1 tablespoon prepared yellow mustard
  • 1 tablespoon Worcestershire sauce
  • 1 tablespoon honey
  • 1/2 teaspoon Louisiana hot sauce
  • 2 tablespoons onion powder
  • 1 tablespoon garlic powder
  • 1/2 tablespoon paprika
  • 1/8 teaspoon cayenne pepper
  • 1 tablespoon chili powder
  • 1 1/2 teaspoons dried thyme
  • 1/8-1/4 teaspoon black pepper
  • 8 Filoncini buns, whole wheat if you can find!

Directions:

  1. Rub the roast with the vegetable oil. Place the roast into the slow cooker. Mix all ingredients together with a fork or whisk. Pour mixture over the roast. Cover and cook on High until the roast shreds easily with a fork, 5 to 6 hours (or on low 8 to 10 hours).
  2. Remove the roast from the slow cooker, and shred the meat using two forks. Return the shredded pork to the slow cooker, and stir the meat into the juices. Let simmer for another 20 minutes.
  3. Toast the Filoncini buns face up under the broiler on high for 3-4 minutes until a little golden brown. Spoon the pulled pork onto the toasted bun. Top with coleslaw and other bun half.
  4. Serve with your vegetables of choice. We paired ours with peppers, broccoli, and carrots.

Until the next family meal,

Melissa Lachapelle, RD

Fresh summer side eats

It has occurred to me that I have been very recipe focused with my blog. It is my intention to include more “articles” on family and pediatric nutrition as time goes on. For now I hope you are enjoying the small tidbits of nutrition advice that I find can easily be paired with a great recipe. Healthy eating can mean making simple small changes to one’s food choices and lifestyle. A nutrition overhaul is often too overwhelming and not sustainable in the long run as people tend to be over zealous and restrictive in the beginning, and then their enthusiasm for change fizzles. If you have nutrition topics you would like discussion on, please do not hesitate to send me an email!

Tonight, enthusiasm for new foods is running high in our household. I am officially on holidays for one whole week, woot woot! What better way to spend my first few hours off, than with my family enjoying some more fresh summer eats! Bryan has really stepped up his game this week. Hopefully he can maintain his enthusiasm for food and new recipes into the school year when we tend to be super busy. Wishful thinking? Well for now I will take what I can get, and tonight this is a juicy summer side salad that everyone in your family will love!

Jicama. I have never had one that I can recall…On the outside it resembles a cross between a very large potato and a turnip, though once peeled has the texture of a crisp apple or pear. It can be eaten or served many different ways: raw with ranch dip (my son Nolan’s choice), raw in summer fruit salad (Hayden, Bryan and I prefer this), in a stir fry, or with other dips like hummus. The sky is the limit with how creative you can be with it. We may explore this more as it will take our family a few recipes to get through the whole jicama. A 1/2 cup is considered a veg/fruit serving, and for those looking to keep calories at bay, it only has 25 calories per serving! It is rich in vitamin C, fibre (3g/serving), and is a source of carbohydrates. I think the best part about jicama is that is new and interesting, so both the boys (and myself of course) tried it. There is nothing like having a Friday night family taste test session!

I have a hankering for jicama side salad

  • 1 cup of diced strawberries
  • 1 cup of diced seedless watermelon
  • 1 cup of diced raw jicama (peeled first)
  • 1/2 cup mango 100% juice
  • 1/4 cup lime juice
  • 1 tsp paprika
  • Combine all ingredients and mix. It tastes best when it has had time for flavours to blend together. This refreshing side salad is a great complement to any summer meal. Makes about 6  – 1/2 cup portions (1 veg/fruit serving per person).
    (Photo from myjewishlearning.com – I just liked this picture best from what I could find as ours was already chopped up!)

Enjoy!

Melissa

Fresh summer eats

Summer is finally here! I am fortunate enough to be married to a teacher who has most of the summer off, so I have been looking forward to my “holidays” from my every day cooking and meal planning. Last week my husband got an A+ for his culinary skills. He made a Chili-lime chicken and rice meal that was quick, easy, healthy, and full of fresh flavours. It was truly his best dish to date, and delicious to say the least.

He was a little hesitant to share his recipe, not because it wasn’t delicious, but because he wasn’t sure it was healthy enough for my blog. He sometimes does not give himself enough credit. He is label conscious and often tries to choose foods lower in salt and fat, he just didn’t know that would translate into healthier cooking. “Healthy” does not have to be fancy cooking that takes hours to prepare. It can be as simple as pairing 3 food groups together and making healthy choices within each of those food groups. Some of the parents that I counsel are embarrassed when they show me a food record from a summer weekend while they were traveling or away. They figure I will scold them for too many snacks. “Snack foods” can become a meal, it just depends on the snacks. Cookies, licorice, and a slurpee is NOT a balanced meal. These are considered occasional foods to have once per week, not to be used in our children’s diets every day. Carrot sticks, crackers, and cheese are often snacks foods, but in the right portions can be a balanced meal for a toddler or child (i.e. 3 food groups, healthier choices) and could be followed by a licorice at a ball game or while camping. As long as we are still doing some meal planning, reading labels, and making healthier choices at the grocery store, we can keep our summer eats healthy and easy. Cheers to Bryan for adding to our healthy summer recipe collection!

Bryan’s Chili-lime Chicken

  • 2 cups of drained canned peaches (packed in juice or water)
  • 2-3 tbsp olive oil
  • 2 tbsp low sodium soy sauce
  • 1 tbsp chopped garlic cloves
  • 1 tbsp Dijon mustard
  • 3 tsp sugar or sugar substitute
  • 1 tsp chili powder
  • 4 tbsp lime juice

In the blender combine peaches, olive oil, soy sauce, garlic, and mustard. Blend until smooth. Add sugar, chili, and lime to mixture. Pour about 2/3 of mixture per 4 or 5 chicken breasts into a dish to marinate for 1-4 hours. Set aside remaining sauce for basting and some for dipping. You can also place the chicken and marinade in a food safe bag or container, and freeze it so it can be cooked another time.

Barbecue chicken on low for 10-15 minutes (depends on your BBQ). Baste each time the chicken is flipped. Turn up the heat on your barbecue for nice char marks to finish cooking. Serve with chili-lime rice. *While the chicken is cooking, make your Chili-lime rice. I usually make my rice in the microwave so that I don’t have to watch it on the stove while I make the rest of supper or while I watch the kids.

Chili-lime rice

  • 1 cup uncooked rice ( I usually make brown, but he made white rice)
  • 1 3/4 cups water
  • 1/4 cup lime juice
  • 1 tsp chili powder
  • 1 tsp dried oregano
  • Cook on high in microwave or on stove top for 20 minutes.

Serve your Chili-lime chicken and rice with your vegetables of choice! Our family prefers salads and fresh vegetable sticks and dip during the summer months. We had carrot sticks and peppers, but I also made cooked carrots and peas for my little guy who doesn’t have very many teeth yet.

Happy summer eats!

Tired of the same ol’, same ol’?

Friends and clients of mine often express that they get in (what I call) a food-rut. It seems to happen most when we get busy and stop planning our meals. We pick up the kids after work, rush home, open the fridge and say to our spouse “What should I make for supper?”; they reply “I don’t care”. So then we look for a few common ingredients to make any recipe that you can think of off the top of your head: stir fry, chili, mac and cheese….sound familiar?

My first maternity leave I was so overwhelmed by having this new little person to care for that I was not very organized or adventurous with our family’s diet. We still ate healthy and I cooked from scratch, but it seemed to be the same batch of recipes over and over again. We definitely got in a food-rut. My second maternity leave, I vowed to not repeat this, and made an effort to surf the web and watch cooking shows while the boys napped. I didn’t try a new recipe every day, but a few times a week and this seemed to help keep food interesting. It also helped our oldest (Nolan) try new foods, or to try foods that he didn’t like, in a new form.

I try to recommend this to my friends and clients:

  1. Try weekly menu planning – this helps keep variety in the diet to avoid the food-rut, keeps your meals well balanced, and can save you dollars at the grocery store.
  2. Pick one day or night of the week that your family is less busy. Use this day to choose one new recipe, shop for the ingredients, and prepare it for the family. If the family enjoys the new recipe, add it to your collection of favorites.
  3. If you’d rather not venture too far outside your comfort zone, or find it difficult to set aside enough time to prepare a new recipe start to finish then kick-it-up-a-notch! What I mean is choose a family favorite recipe and try a new or modified version of it. This is sure to help keep things fresh but also practical.
  4. If you find the concept of a new recipe too much, maybe try tackling a new food preparation or cooking skill. Once you have a new skill mastered, recipes will not seem so much of a stretch.

This weekend, my husband and I decided to try a new recipe AND to kick our mac and cheese recipe up a notch or two! Our recipe of choice: Spicy Fish Tacos! We typically do not fry anything in our house, but love to watch Eat St. where food trucks often serve some delicious-looking version of a fish taco. Nolan has never really liked fish other than a tuna sandwich, so I wanted to offer fish to him again in a new way. He loved this fish taco but with mayo and a smaller amount of sauce.

Last night’s delicious find: Spicy Fish Tacos adapted from Allrecipes.com

Spicy Fish Tacos

Ingredients

  • 1 cup all-purpose flour
  • 2 tablespoons cornstarch
  • 1 teaspoon baking powder
  • ½ teaspoon salt
  • 1 egg
  • 1 cup beer (we used Bud light lime)
  • ½ cup plain yogurt
  • ½ cup light mayonnaise
  • 1 lime, juiced
  • 1 jalapeno pepper, minced (seeds and ribs removed)
  • ½ teaspoon dried oregano
  • ½ teaspoon ground cumin
  • ½ teaspoon dried dill weed
  • ½ teaspoon ground cayenne pepper – We found 1 tsp too hot for the kids
  • 1-2 cups of canola oil for frying (so there is 1 cm of oil in your pan)
  • 1 pound cod fillets, cut into 2 to 3 ounce portions
  • 1 package of small whole wheat tortillas – I couldn’t find corn tortillas at our grocery store
  • 1/2 medium head cabbage, finely shredded
  • 2 hothouse tomatoes chopped
  • *Chopped cucumber would also pair nicely with this recipe for a fresh feel

Directions

  1. To make the beer batter: In a large bowl combine flour, cornstarch, baking powder, and salt. Blend in the egg and beer, then quickly stir into the flour mixture (don’t worry about a few lumps).
  2. To make the spicy sauce: In a medium bowl mix together yogurt and mayonnaise. Gradually stir in fresh lime juice until consistency is slightly runny. Season with jalapeno, oregano, cumin, dill, and cayenne.
  3. Heat canola oil over medium-high heat in a large skillet or cast iron frying pan. The oil is ready when you stick the handle of a wooden spoon in it and little bubbles form.
  4. Dust fish pieces lightly with flour. Dip into beer batter, and fry until crisp and golden brown. This takes only a few minutes. Drain on paper towels.
  5. To serve, place fried fish in a tortilla, and top with shredded cabbage, tomatoes, and dollops of the spicy sauce.

Happy Canada Day!

Monday night madness!

Usually I feel as though there is a little Sunday night madness in our house: A busy weekend, supper, playtime, dogs barking, bedtime routine, getting the kids bags packed for the dayhome, lunches prepped for the husband and I, and prepping/planning tomorrow’s supper meal to avoid hunger cries when we get home…did I mention breathing? Sometimes it doesn’t seem like there is enough time for that. This weekend was the May long weekend, therefore, Monday night madness! My meal planning has been more of a challenge the last week or so due to my return to work, but I am sure we can all agree that every week can be considered a challenge when you are a family on-the-go.

I have opted to start my week with a slow cooker meal so that there are plenty of leftovers and we can use up some brown rice from the other day. My husband loves sausage…loves shrimp…and loves chicken. Need I say more? Jambalaya is such a great conduit to use up odds and ends, while making a balanced meal. However, it can become a meal high in fat and cholesterol if you don’t shop wisely. Choose lean chicken breast (trim any extra fat), compare sausages to find one with less fat and salt (mine was 4% fat, 11% salt – occasionally you may do better with a turkey sausage), and go easy on the shrimp! Adding extra veggies, pairing it with brown or whole grain rice, and portion control are also important to keeping this meal out of the red. There are a lot of great recipes on the internet! I am partial to The Food Network’s recipe ,but I always seem to make some modifications to fit what I have to use up, accommodate what my family likes, or boost the nutrition wherever I can. Here is my adaptation for your slow cooker:

JAMBO JAMBALAYA

Ingredients

  • 2 large boneless skinless chicken breasts, cut into 1-inch cubes
  • 375g MSG free Kolbassa sausage, diced
  • 1 796ml can no added salt diced tomatoes (or 3-4 large fresh tomatoes if you have)
  • 1 medium onion, finely chopped
  • 1 green bell pepper, seeded and chopped
  • 1 orange bell pepper, seeded and chopped
  • 1 jalapeno, ribs and seeds removed, diced * can include the ribs/seeds if you like your jambalaya extra spicy
  • 1 ear of corn, remove niblets with a knife
  • 1 stalk celery, chopped
  • 1 cup of no added salt canned black beans, rinsed
  • 2 – 4 cups reduced-sodium chicken broth
  • 1 tbsp dried oregano
  • 2 tbsp Cajun seasoning
  • 2 teaspoon hot sauce
  • 2 bay leaves
  • 2 teaspoon dried thyme
  • 1 tsp garlic powder
  • 454g frozen peeled and cooked shrimp, thawed
  • Serve with cooked brown rice (1/2 cup is one grain serving)

Directions

In a slow cooker, combine chicken, sausage, tomatoes, onion, green pepper, orange pepper, corn, celery, jalapeno, and chicken broth. Stir in oregano, Cajun seasoning, hot sauce, bay leaves, and thyme. I usually dice my chicken and put it in a food-safe container, and mix all my other ingredients together in a second container the night before so that I can transfer them to my slow cooker in the morning.

Cover and cook on LOW for 7 – 8 hours or on HIGH for 3 hours. Stir in the thawed shrimp then cover and cook until the shrimp is heated through This should be about 5 minutes. Discard bay leaves. Makes 8-12 servings to be spooned over brown or wild rice. It is also a freezer-friendly recipe so you don’t have to eat all the leftovers at once.

Happy Monday!

Melissa Lachapelle, Registered Dietitian

Breakfast for supper?!

Earlier this week my husband was away for a conference, so there was little pressure to have supper meals preplanned. I occasionally like to switch things up and have a breakfast for supper type of meal. I find that breakfast is often my children’s best meal, so why not have a breakfast-like meal for supper they might be more inclined to eat? Now looking for inspiration…what to make? While on maternity leave I often watch the Rachael Ray Show for mealtime inspiration. That is not to say I make all her recipes as she presents them, but rather take note, and modify them based on what my family likes (or dislikes!) and what is in my fridge and pantry.

There was still little to be had in our fridge since last week’s breakdown, so ingredients were few and far between. It was waffle week on the Rachael Ray Show, yes! I always have flour, eggs and milk on hand! There were some really neat ideas presented on how to use your waffle iron for unconventional recipes (though some not so healthy). So I pulled out my twice used waffle iron and dusted it off. I opted to make a simple waffle, mostly due to the fact that Nolan (2yrs) is a picky eater and I knew he would like a basic waffle rather than something overly extravagant. When I told him I was making waffles he said “Mom, that is my FAVORITE!!!” and he shook in pure delight. I think he has only had a waffle twice in his life and at restaurants only, but I was rolling with it! I even had him help me pour the waffle batter onto the waffle iron (hand over hand of course) and he was that much prouder of our creation. Picky eaters such as Nolan (and most kids for that matter), are much more invested in what they are eating if they help choose it, buy it or make it. If you can find a way to get your kids involved in healthy cooking and healthy shopping, then the healthy eating part (and actual eating!) will take care of itself.

Here is our Waffles for Supper recipe:

Ingredients

  • 2 eggs
  • 2 cups whole wheat flour
  • 1 ¾ cup 1% milk
  • 1/3 cup vegetable oil
  • 1 Tbsp white sugar
  • 4 tsp baking powder
  • ¼ tsp salt
  • ½ tsp vanilla extract
  • ½ tsp cinnamon

Preheat your waffle iron. Beat eggs in large bowl with a whisk. Beat in all ingredients until just smooth. Spray your waffle iron with non-stick cooking spray. Pour mixture onto hot waffle iron. I found that 1/3 cup batter per waffle made perfect waffles. Cook until golden brown and serve warm with pureed fruit sauce – we made a warm strawberry sauce (no sugar added). This recipe makes 12 waffles. The extra waffles freeze great and can be reheated using your toaster.

Nolan's supper - this is a larger meal for him
My meal, with some pineapple on the side

Nolan paired his waffle with natural ham (nitrate and preservative free) and fruit. I gave him too much ham (1 full slice), but he loved the waffle cut into strips and the ability to dip them into his strawberry sauce. With leftover waffles to freeze and clean plates (even Hayden!), the dogs were disappointed there were no leftovers to be had!

Until the next family meal!

Powerful Peppers!

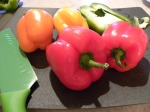
Probably one of my favorite meals is a fajita. I love a saucy chicken fajita with brown rice, a soft tortilla, and plentiful of peppers red, orange, yellow and green. I love them just cooked so they are slightly crunchy, juicy and definitely not limp!

Peppers are the definition of healthy, as they fit the description of the brighter the better in Canada’s Food Guide to Healthy Eating. A half cup (125mL) of sweet bell peppers is equal to 1 serving of vegetables. Peppers are low calorie, extremely low in carbohydrate, a source of fibre, and are packed with micronutrients! To name just a few, peppers are rich in Vitamin C (more than an orange!), Beta-Carotene and Lycopene which are important antioxidants that help to maintain eye and skin health, and have a role in cancer prevention among other benefits. Here is my fajita recipe packed with powerful peppers!

  •  1 ½ cups dry brown rice, plus 3 ½ cups water
  • 2 or 3 chicken breast cubed (I use 2 large ones – they seem to be getting so big these days!)
  • 1 Tbsp olive oil
  • 2 Tbsp onion powder
  • 2 cloves fresh garlic finely minced
  • A pinch of hot pepper flakes or 1 chopped jalapeno optional (I usually use a jalapeno with ribs and seeds removed but today used the flakes)
  • 1 Tbsp chili pepper
  • 1 tsp cumin
  • ¼ tsp black pepper
  • 2 Tbsp cornstarch mixed with 1/4 cup water
  • 1 cup low sodium chicken broth
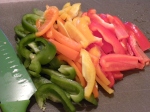
  • 4 bell peppers, sliced and halved
  • 6 – 8 whole wheat tortillas (or other variety)

First I start cooking my brown rice on the stove top. Meanwhile I cube the chicken breasts and cook with the garlic (and jalapeno if you have one) over medium heat with the olive oil. Then I slice and halve 4 peppers (1 of each colour if you like!). Once the chicken is just cooked I add the onion powder, chili powder, cumin, hot pepper flakes, black pepper, low sodium chicken broth, and cornstarch and water mixture. I stir the sauce to ensure no lumps then add the peppers and cook for an additional 5 minutes so the sauce is thick and bubbly. I often keep the saucepan lid half on for this so that there is more liquid released from the peppers for the sauce. *If I am strapped for time, I will use the Epicure fajita mix and a jalapeno, or another prepackaged taco mix that is 40% reduced sodium that you mix with water. Either can be added with the peppers near the end.

Occasionally I will offer black beans from a can (rinsed and drained) for some added fibre. I like to keep the rice and beans separate from the other ingredients, so people can choose how much they want of each ingredient.  Then you simply assemble your fajita in a tortilla as you please! This recipe serves 6 adult portions, or for our family 2 adults and 2 children for 2 meals!

Despite my 2 year old son being a picky eater, on a good day he will try a small fajita of his own (as long as there is ranch for dipping! haha). On a less than perfect day he will at least have the chicken or beans, rice and peppers separate on his plate.

Until the next family meal!

When life gives you lemons. . . make meatballs!

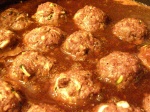
It has been a stressful year due to many unexpected expenses we have recently had while on Maternity Leave….first we had car issues (I could write a BOOK on this so I will not go on), then we had some plumbing issues, and then our washer and dryer broke. I thought we were free and clear for 2012, but now our fridge has gone bust. There is that saying that when life gives you lemons, you make lemonade. In this case, I literally took my lemons and created a hodge-podge meatball recipe last night in an effort to use up as much of our not-yet-spoiled food in the fridge. It tasted great and all 4 of us were wanting more! Despite my family’s recent household mishaps, I am reminded of a sign I saw recently that read “Health is Wealth”. I am very grateful that my family is in good health, so I will stop complaining now and eat a delicious meatball!

Until the next family meal!

Trading Lemons for Meatballs

  • 2 lbs. extra lean ground beef (you could use lean ground pork, turkey or chicken)
  • ½ -1 zucchini, grated (mushrooms or carrots work great too!)
  • 1 bunch of green onions (~ 6), finely chopped
  • 1 cup of bread crumbs – now I typically make mine from stale bread and a variety of crackers – whatever you have left over at the bottom of a box, and add a little oregano and basil
  • 2 eggs
  • ¼ tsp pepper
  • 2 cloves of garlic, pressed or grated into a paste
  • Sauce: These meatballs are excellent with a homemade tomato sauce, mushroom sauce or in my case today I made a sort of sweet and sour sauce.
  • In a saucepan: squeeze the juice of 2 lemons, 1 cup of plum sauce, 2 Tbsp low sodium soy sauce, 1 Tbsp Worcestershire sauce, ¼ – ½ cup honey, ¼ cup sesame salad dressing, 1 cup low sodium beef broth, and ½ cup water (which helps clean the sauce out of the bottles).

Preheat your oven to 350° F (thank goodness ours still works!). Line a baking sheet with tin foil. By hand roll 1 to 1 ½ inch balls. Place meatballs 1 inch apart.

Bake for 20 minutes or until tops are brown and slightly firm so the meatball will not crumble when handled. This recipe makes approximately 40 meatballs. Meanwhile mix all sauce ingredients in a saucepan and let reduce on medium heat for 20 minutes, stirring occasionally. When the meatballs are ready, add to the sauce with tongs (so there are no extra fat drippings) and simmer on low-medium heat for an additional 5-10 minutes.

If you actually make 40 meatballs, I would consider 1or 2 meatballs for a child size portion, and 3 or 4 meatballs for an adult portion. I served mine with ½ – 1 cup brown rice (1-2 grains), a ½ cup steamed yams and 1 cup salad greens (2 vegetable servings).